

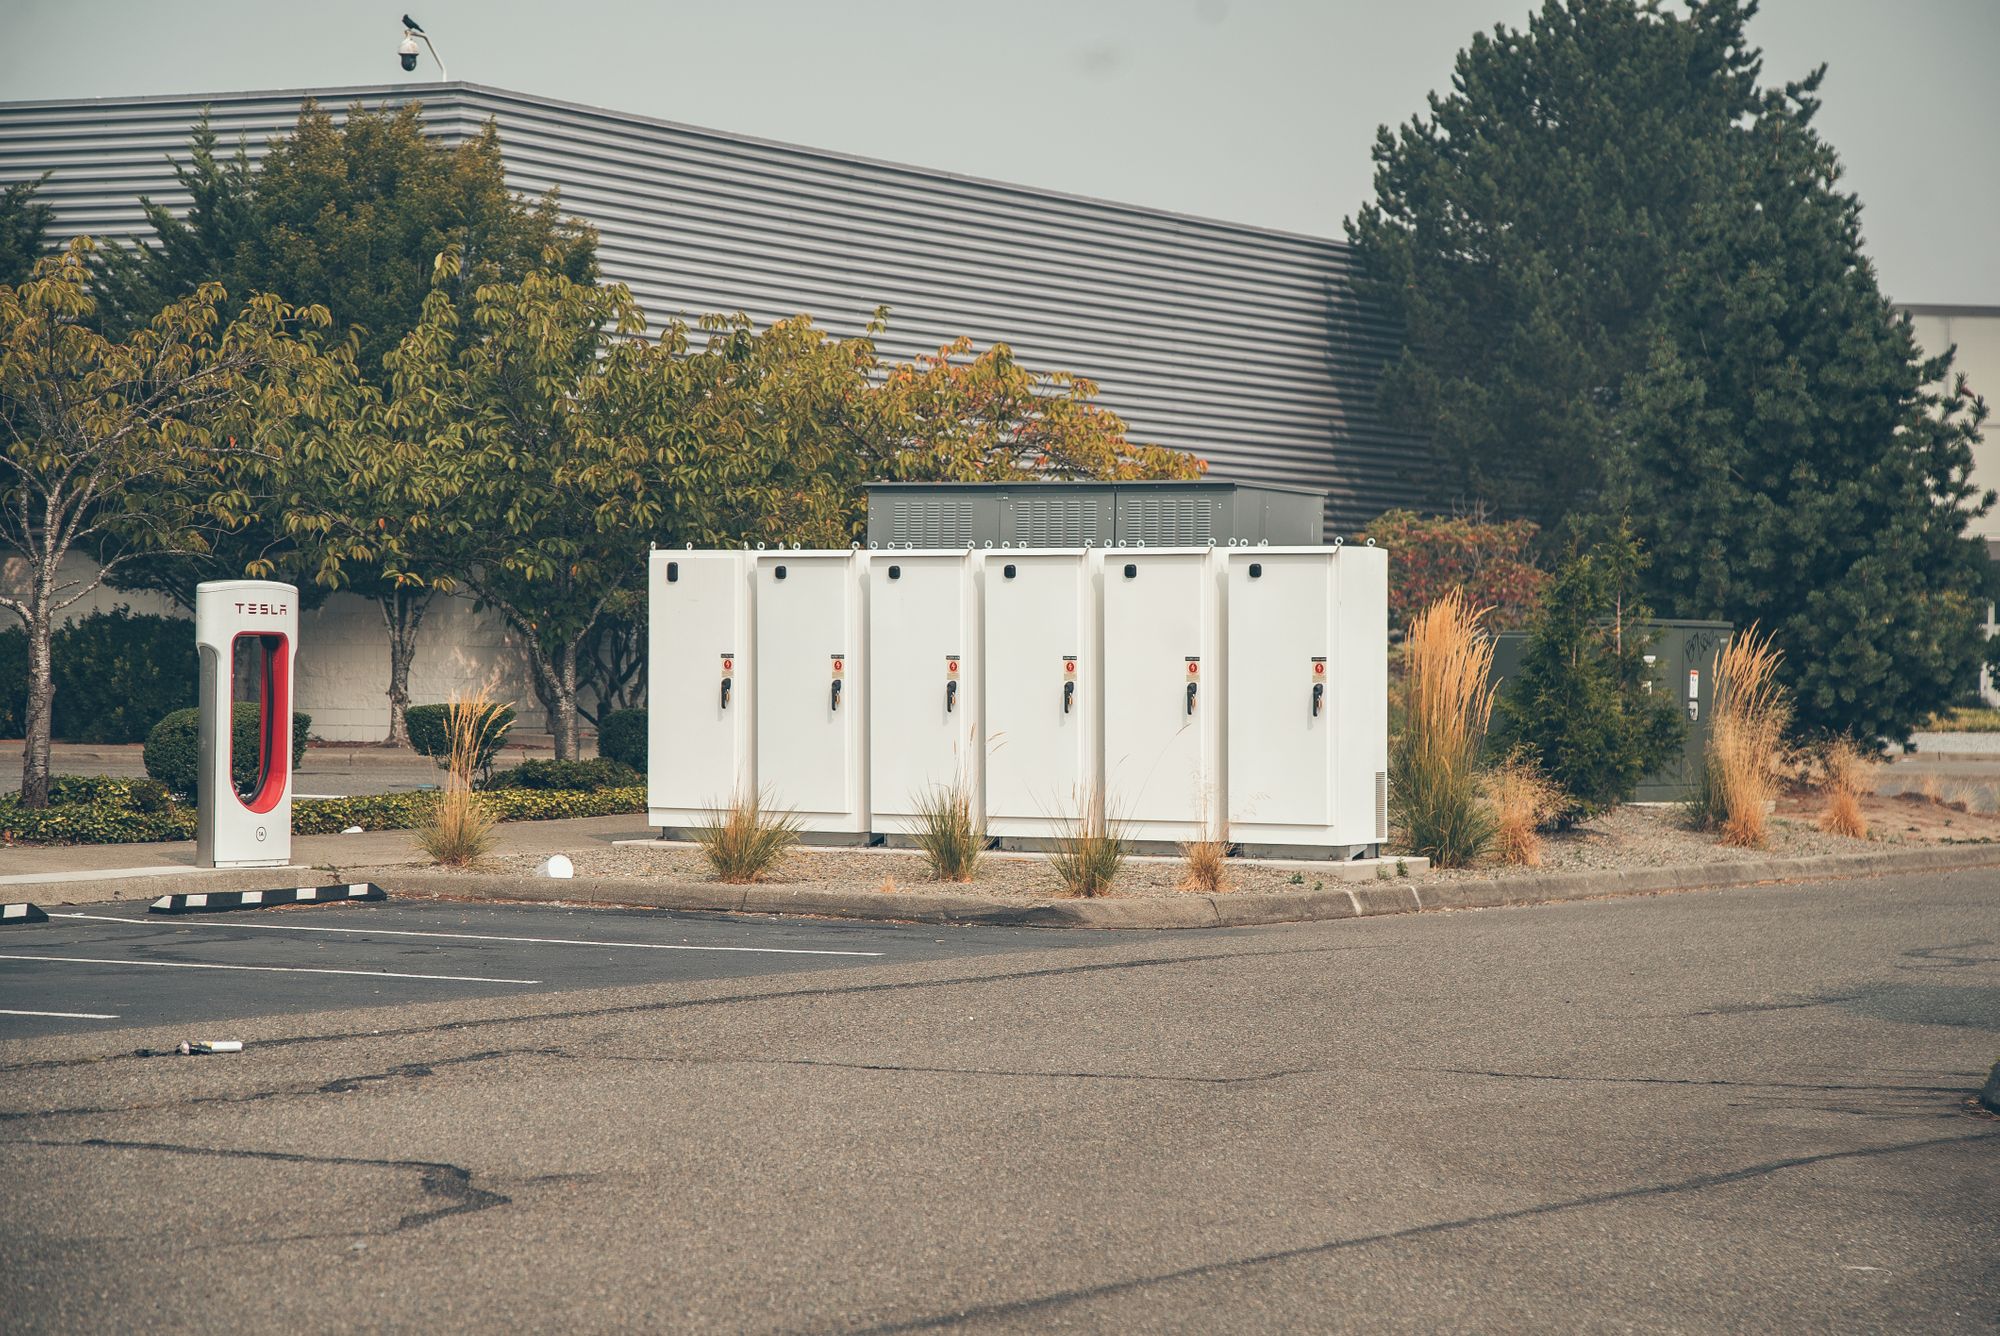
The Tesla Supercharger station allows you to charge 80% of your battery in 40 minutes, which is a truly amazing achievement in technology. So, what would happen if we brought the supercharger home? What if you were able to take the speed and high capacity charge to your house or cul-de-sac? You would be able to charge at lightning fast speeds without waiting in line. You’d be the envy of the Tesla community. Imagine saying goodbye to those low level chargers and long wait times by charging at 200kW from your at-home charge stations.
So what exactly is a supercharger? Well, the definition of a supercharger by Tesla is a 480V high-speed charger developed to create a network of onsite charging stations. This network encourages people to buy Tesla because it will make their superchargers as available as gas stations. As a driver this will take away the anxiety and fear of having a dead battery, also known as “range anxiety”.
Tesla offers multiple supercharger plans to use at the stations, the lifetime, the 100 to 40kWh per year, and the single credit plan. You may also pay on a per use basis which is usually billed based on time spent charging up. These plans can cost you up to $1.30 per minute, or around $0.30 per kWh. If you stay past your charge you’ll also be billed an idle fee of $1.00 per minute when the station is at capacity.1
This is more than double what the average Tesla driver in the United States spends, which is $0.13 according to Optiwatt, a free app that tracks exact charging costs for Tesla owners.
Parts needed to install a Supercharger at home
What would it take to build your own system? Tesla superchargers have a top range of 250kW and are powered by 480V phase three line, which is a lot of power, but could you really get a license for this? First, you will need a step-up Transformer to convert the standard 240v phase one line to turn it into a phase three 480v line. This 480V is a dangerous voltage to install and must be approved by city officials, energy agencies and often installed by high-grade electricians.
After you get your transformer you will need to get a metering transformer cabinet, electrical meter, correction capacitor, a high capacity breaker box, circuit breaks and an emergency shut off switch that can handle 480V and the proper kVA for this equipment.

Finding the correct Kilovolt Amps (kVA)
For our equipment, we have 480V and 250kW but we need to know how much kVA that will be running through it.

Here is our equation and it has what we need to solve for amps. Our equation comes out to 521.15 amps, with these amps now we can solve for our kVA. In the equation below we have plugged in our volts, amps and the 1.732 is for our phase three line. Our kVA equals out to 433.26. I do suggest checking this with an amps-to-kVA calculator to verify that you solved correctly.3


The Transformer
One thing to keep in mind is that transformer's ratings for amps or kVA do not get very specific numerically. High-end phase 3 electric transformers Amp ratings look like 100A, 200A, 300A, and so on. With the 433.26kVA we would want a transformer that is also rated for 600kVA or 800kVA to be safe.
You can find set up transformers with a quick google search 4 and the transformers that are rated for 480V, 433.26 kVA and 521.13A run around $30,000 to $40,000. The next is to get a Metering Transformer Cabinet which is a requirement of energy companies when using high powered lines. These cabinets are about $3,500 to $4,000 and you will need to attach an electric meter to the side of the transformer cabinet which will cost another $400 to $600.
The Breaker Box
We will also need a breaker box that is rated for 480V and can handle a full load of a phase three line. This is just like your breaker box at home but 10 times larger and it will make sure to trip over to off when an electrical surge happens. This prevents your whole system from being melted. Now the breaker box will be about $2,500 to $5,500 and you will need circuit breakers installed into the box too. The breakers run about $5,000 to $8,600. These industrial rated breakers are able to handle the Amps coming in and the heat that is made when running such a high voltage system . Platt is one of the companies that sell industrial breaker boxes and circuit breakers that meet the standards of this high voltage project.5
The Correction Capacitor
Adding another item to the breaker box will be a correction capacitor. Why is it needed? It reduces extra consumption of electricity in the system and helps with the transformers load so it doesn't over-strain it. The pricing for this runs about $1500 to $5,000.6
The Safety Switch

Another small ticket item is a safety switch which will allow you to shut off the power if anything goes awry within your electrical system. These are required in all high voltage systems and will be necessary in order to get your supercharger station approved. These switches run about $3,100 to $6,300 for the 600amp rating. The Circuit box and capacitor will be next to each other within the layout being the private power system. National fire laws require that the safety switches be 50 ft from circuit breaker boxes and transformers. The reason the switch is placed in the system is to shut down the power in a safe way. Just in case the safety mechanisms in the transformers fail the breaker box is overloaded. This will most likely be at the entrance of the area that holds the breaker box and transformer. With the location of this electrical hub it can either be placed underground or above ground; both locations will need to be properly labeled with “high voltage” signs.

Permits
Now that we have all the parts to power the supercharger we are ready to start installing right? But hold on, you're going to need to have permits for this project as well. Permits have different types of requirements depending on which state you live in and which city you live in too. Looking at the state of California if you want to do electrical work you have to abide by energy conservation requirements for your permit requirements.7 Extra fees do apply with this type of project because you need to trench for your new electrical line and have an electrical survey done showing where the current electrical lines are. Keep in mind if you start building or installing your equipment without your permits approved you can be fined for each permit violation, so make sure every form is approved. Upon applying for the permits the city you apply in will give you a total cost adjustment for the install and will recommend electricians for the job
Here are the permits you must have in order to start your project within the state of California.
Zoning Plan-Check
This makes sure your area is zoned to have what you are building.
Erosion-Control Preliminary Site Inspection
This is to cover the cost of sending someone out to do a geological and environmental survey of your area. They will check for hazards within the property.
Building Plan Check
This is to make sure the project is up to all building codes and they match up with the energy conservation requirements.
Building Permit Processing
This cost is for sending the sets of the plans out for review to outside parties. From here they communicate all the fees on the project and make two copies of the project kept on file. The other copy is stored on site during construction.
Public Works (Drainage)
This is for someone to check over your plans to see if it inhibits any water drainage on your property. The public works official will also make sure that your project that is being installed drains and doesn’t retain water where it's located.
County Fire Plan Check
This is an overview to see if your project needs a sprinkler system installed.
Affordable Housing Impact Fee
This is to determine how many square feet your new project will take up.
Other Fees
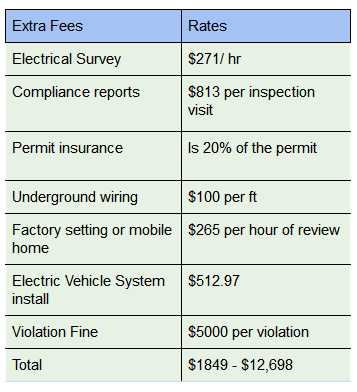
There is a 6% fee that goes into the maintenance and general update that is required of all building permits. The average sum of these permits are $1314 to $7500 which doesn't include extra fees.8
Extra fees can be about $1,849 or up to $12,698, all depending on how much wire you have to run and how long it takes to review. Make sure you get your permits handled properly and do not start work without the permits or you will pay $5000 per violation as a punishment for starting without the proper clearance.9
Hiring a team to wire in your new supercharger system is a state requirement. This is because a licensed electrician is the only person who has been trained to handle a 480V line change from 240V power line. The job will be done by a Master electrician and his team. The equipment that will be installed by this team is a step-up transformer, the metering transformer cabinet, the breaker box, capacitor, emergency shut off switch and supercharger. Due to the large amounts of equipment the team will consist of 1) Foreman 10 2) Master electrician, 3) Journeymen and 4) an apprentice electrician. The cost breakdown for each person is $40hr for the apprentice, $60hr for the two journeymen, $100hr for the Master electrician and the foreman is $60hr.11 If everything is delivered onsite on time and there are no additional delays, you can expect everything to take about two weeks for the install.The permit approval is another thing because it can add up to 50 to 100 days to get approved.12 The labor costs will be about $25,600 for all of the people onsite. Keep in mind if you have your electrician work 10 hour days or on weekends there will be an overtime charge added to the labor costs; because the electrical labor unions have added this in their contracts for their employees. 13

Charger Costs
The chargers at 250kW are limited because there are not many on the market. BTC power offers a 50kW to a 200kW charger. The 50kW charger costs $5,000 to $10,000. The cost for the 100 to 200Kw model is $26,102 to $49,504 for the charger and the time on filling your battery is around 30 mins to 1.5 hrs depending on your battery capacity.
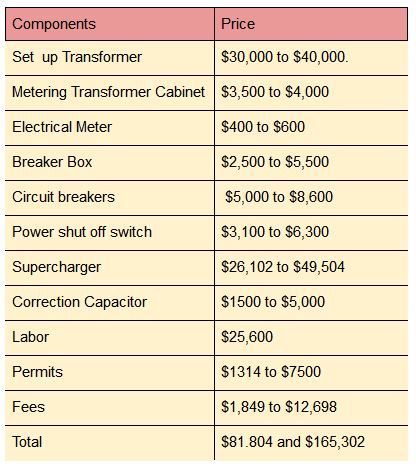
Finally, all the work on the electrical equipment has been finished, the final review from the city has been approved and your “at home supercharger” is finished. At this point your total cost is between $81.804 and $165,302. Yes, this is a small fortune spent to install an at-home supercharger so that you don't have to share, but you will become the envy of the Tesla community.
Realistic Alternatives
With this outrageous price tag and long process, I did come across a more reasonably priced home “supercharger”. The smaller supercharger is the Bosch EV2000 which offers 25kW for $11,348 and it's a single phase at 240V. The EV2000 is more practical and cost effective than the 200kW supercharger station. The Bosch can be wired into a 240V single phase line and it powers your vehicle in about 3 to 4 hours. While this is no supercharge, it certainly is more gentle on your wallet.14

After all that, let's face it, it’s still impractical to build your own supercharger in 2020, but that doesn’t mean it’s not possible in the next 5 to 10 years. Tesla has grown their Supercharger network by about 1000 stations from 2014 to 2020, and there is no reason to believe this trend won’t continue.
For now, the best alternative is the level 2 240V Bosch EV2000. It's $153,954 cheaper than trying to build a supercharger with complete electrical hookups and you don't have to pay an electrician $25,600. Plus, the at-home stations have several companies that make models that integrate with your Tesla by an adapter. The level 2 systems make it a lot easier to charge at home and don't consume outrageous amounts of electricity like a supercharger. So go check out ClipperCreek, JuiceBox, Bosch, AxFast, Lectron, Hubbell, Chargepoint, and Tesla with their new Gen 3 charger.15